Article: 8 Log Cabin Staining Tips for Even, Long-Lasting Color

8 Log Cabin Staining Tips for Even, Long-Lasting Color
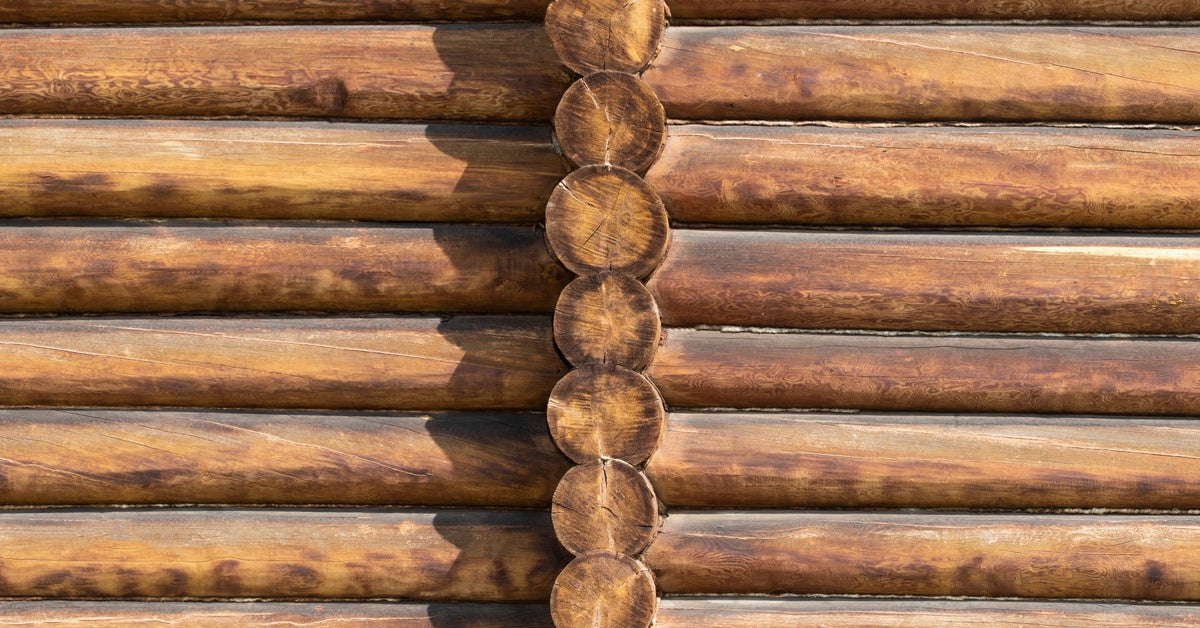
If you’ve ever looked at a cabin and wondered why one stain job looks rich and even while another turns patchy a lot sooner, you’re not the only one. Good results usually come down to the little choices made before and during the job. Log cabin staining tips like these help you get even, long-lasting color without wasting time, stain, or effort. Whether you’re handling your own place or staining for a client, it helps to know what actually affects the final look before you start.
Proper Surface Prep Helps Stain Go on Evenly
Don’t rush into stain application. If you apply the finish before preparing the wood first, it won’t go on evenly. You’ll want to remove the old coating using a proper stripper or cleaner made for exterior wood. You’ll also want to check for surface issues like mold, mildew, or leftover residue, which can cause uneven color if they stay on the logs.
When you have a clean, smooth surface, the stain will stick more evenly and absorb in a more consistent way. Prep work takes time, and you may be impatient to just get the stain on, but skipping this step often creates more work when the first coat dries and the color looks off.
Priming the Wood Improves Adhesion
In addition to cleaning and repairing the wood prior to staining it, you’ll also want to apply a primer in some cases. If you’re using an acrylic finish, a primer like Prelude or Colorfast can help improve adhesion and support a longer-lasting result.
But if you’re using a penetrating oil stain, like Outlast Q8, Sundance, and PPG SRD, these don’t require this type of primer because they’re designed to soak into the wood instead of forming an acrylic coating on the surface.
Dry Wood Absorbs Stain More Evenly

Has it rained, snowed, or been humid recently in your area? You may want to hold off on staining until it’s been dry and sunny a few days in a row. When wood is damp, the stain won’t soak in at a consistent rate.
That happens because the water already inside the wood fills part of the space the stain needs to soak into. As a result, the stain gets blocked in wetter areas and penetrates better in drier ones. That can leave the color looking uneven across the cabin. Letting the logs dry fully before staining helps the finish settle in with a more uniform color and better staying power.
Apply Stain in Thin, Even Coats
A heavy coat doesn’t give you better color. It gives you uneven absorption, shiny spots, and sections that dry at different speeds from one log to the next. Wood can only absorb so much stain at one time. Once that limit is reached, the extra product stays closer to the surface and leaves the finish looking darker in some areas and lighter in others.
Thin, even coats help the color build more consistently across the cabin. They also makes drips, lap marks, and overloaded sections easier to catch before they dry into the wood. That’s especially important on large exterior walls, where one section can start drying before the next one is finished
Keep A Wet Edge as You Work
One of the fastest ways to end up with uneven color is letting one section dry before the next section blends into it. That creates lap marks, which show up as darker lines or patchy bands across the surface. On a log cabin, those spots can stand out even more because the shape of the logs already creates natural shadow and depth.
Working with a wet edge helps the stain blend from one area into the next before it starts drying. That gives the color a more uniform look across long walls and around corners.
Stir The Stain Often to Keep Color Consistent
Stain color can shift during application when the product sits too long without being mixed. Pigments and other solids settle to the bottom of the container over time, which means the stain near the top can go on lighter while the stain near the bottom goes on darker and heavier. That can create visible variation across the cabin, even when you’re using the same product from start to finish. Regular stirring keeps the color more even from one section to the next.
Test The Color Before You Stain the Whole Cabin
Stain can look different on your cabin than it does on a sample card or inside the container. Wood species, age, previous exposure, and surface condition all affect how the color turns out once it hits the logs. That’s why a stain that looked right at first can end up reading too dark, too light, or too uneven once it spreads across a larger area.
A small test patch gives you a chance to check the color before you commit to the whole exterior. It also helps you see how the stain reacts to that specific surface after cleaning and prep. That way, you can catch absorption issues, color changes, or coverage problems before they show up across an entire wall.
Match The Tool to the Surface You’re Staining

Different parts of a log cabin call for different tools. A brush works better on rounded logs, corners, and checks because it can reach low spots and spread stain into the grain more evenly. Pads and rollers can work on flatter wood surfaces, but they may leave lighter coverage in recessed areas and heavier buildup on high spots if the surface has a lot of shape to it.
That’s why tool choice should follow the surface, not just personal preference. If the wall has deep contours or visible texture, a brush gives you more control over where the stain goes. If you’re working on a smoother area, another applicator may help move the job along without changing the look too much. Use the tool that helps you cover the wood evenly instead of fighting the shape of it.
Get The Look to Last
A good stain job doesn’t come from luck. It comes from paying attention to the surface, the weather, the product, and the way it goes on. These log cabin staining tips help you get even, long-lasting color that looks better on day one and holds up better over time.
If you need an easy-to-maintain, long-lasting log cabin exterior finish, come view our selection of log cabin exterior finishes at Timeless Woodcare Products. We have several types of stains available, as well as primers from Prelude and Colorfast for improved adhesion and the tools to apply stain more evenly. Shop now and get your next project off to a strong start.